Posts

Showing posts from April 13, 2023

Basic Single Crochet Wine Cozy

Image
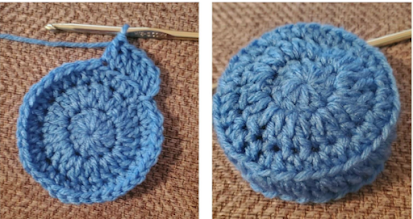
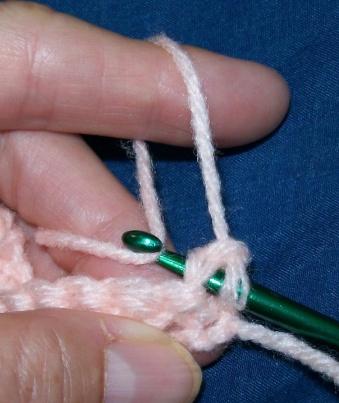
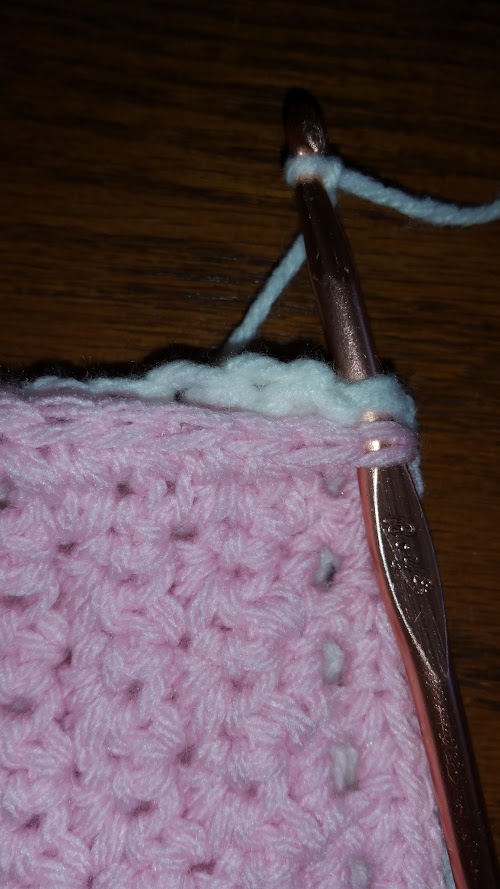
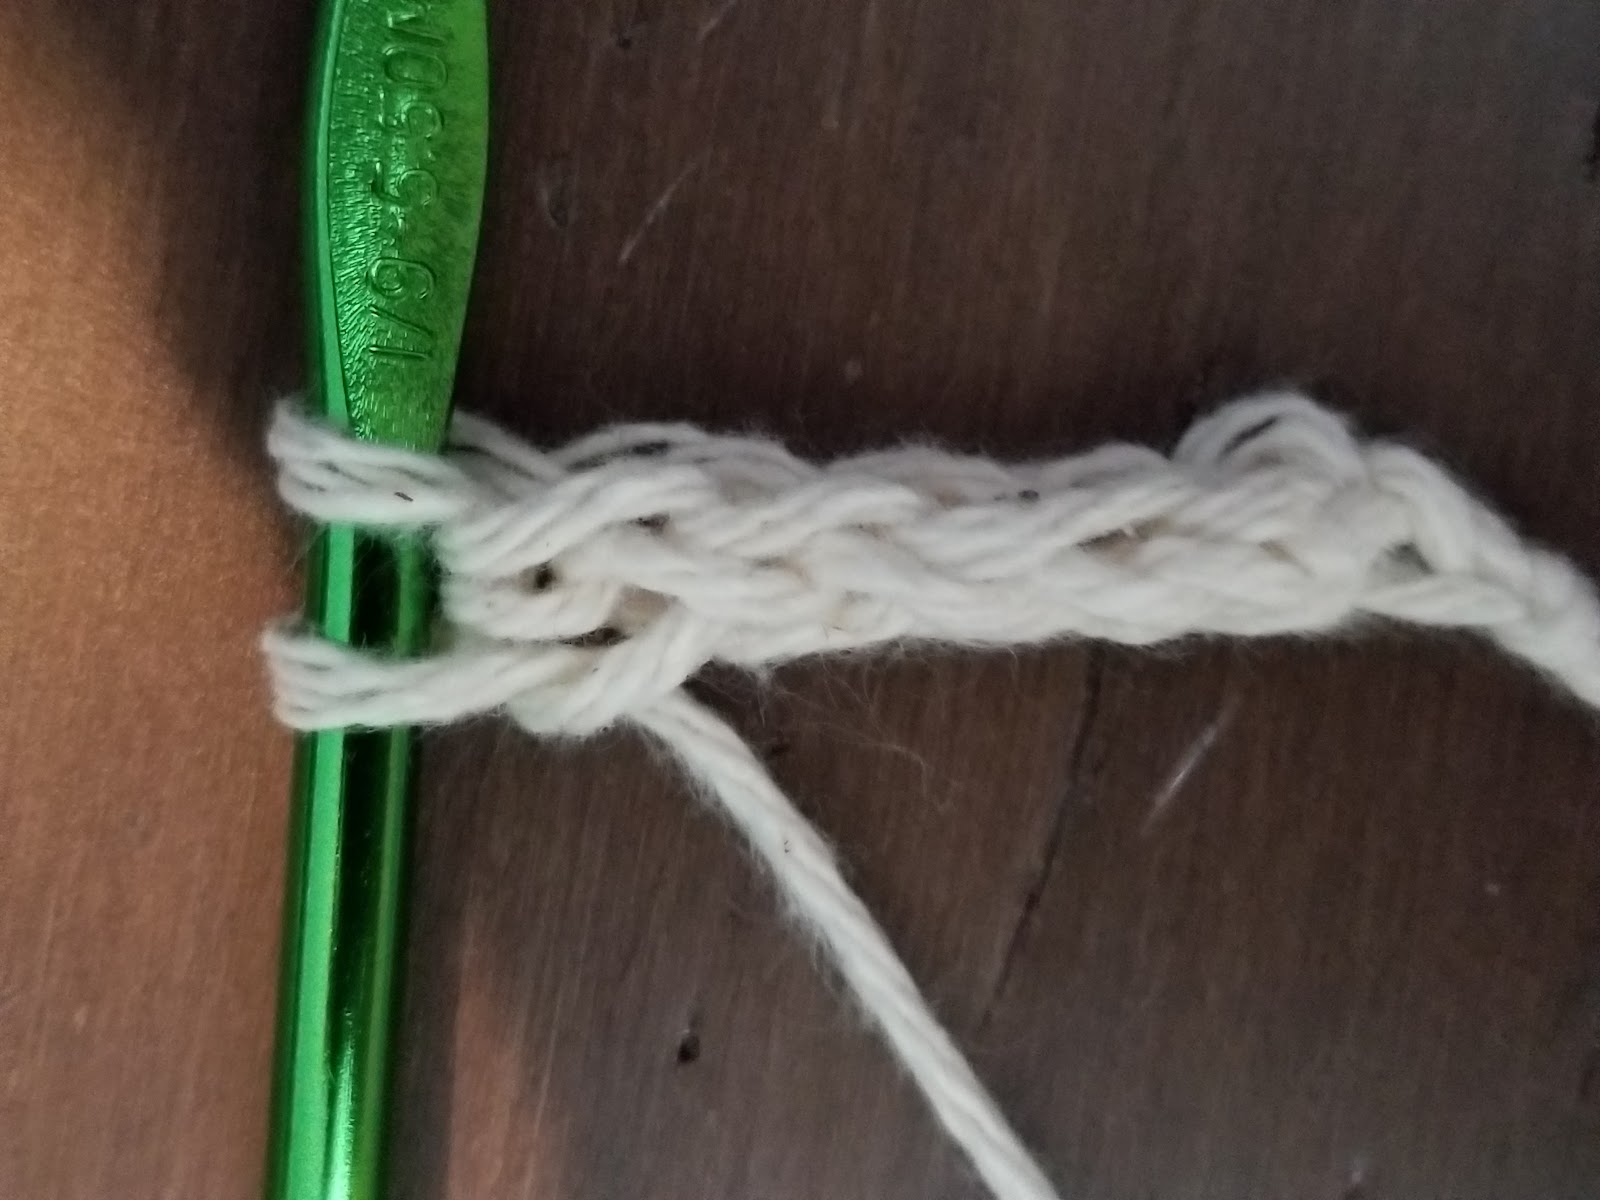
Wine Cozy Materials Needed:  2 Ounces of Worsted Weight Yarn and size H crochet hook. Rnd 1.  With yarn and H hook, make a magic circle or ch 4 and join to the first ch with sl st. Ch 1, make 8 sc in the circle. Do not join , but do mark 1st st. (8 sc made.) Rnd 2.   Make 2 sc in each st around. (16 scs made.) Rnd 3. (Sc in first st, make 2 sc in next st) repeat around. (24 scs made.) Rnd 4.  (Sc in each of the next 2 stes, make 2 sc in nex st) around. (32 scs made.) Rnd 5. (Sc in each of the next 3 sts, make 2 sc in the next st) around. (40 scs made.) Turning Rnd 6.   Sc in the back loop of each st around. (40 sc made.) Rnd 7.   Begin working through both loops once again sc in each st around. (You will be working in the round so you may remove your marker. (40 sc made.) Rnd 8.   Sc in each st around. (40 sc made.) Next Rnds.  Rep Rnd 8 until the piece is 8” long. On the last row do join to 1st st made. Beading Row. Ch 4, (counts as 1st dc and ch 1) sk 1 st (dc in next st. Ch 1 and s

Basic Wine Cozy in Double Crochet

Image
Wine Cozy in Double Crochet Materials Needed: Worsted weight yarn and size I crochet hook. Rnd 2. Ch 2, make 2 dcs in each st around. Join to the top of 1st dc with sl st. (24 dcs made.) Rnd 3. Ch 1, make 2 hdcs in the same st. Hdc in next st. (Make 2 hdcs in the next st, hdc in next st) around. Join  in the back loop of 1st hdc with sl st. (36 hdcs made.) Turning Rnd 4.  Ch 2 and Dc in the blo of each st around. (36 dc made.) Rnd 5.  Ch 2 and begin working through both loops once again dc in each st around. (36 dc made.) Rnd 6 .  Ch 2 and dc in each st around. (36 dc made.) Rep Rnd 6 until the piece is 8” long.  Beading Row. Ch 4, (counts as 1st dc and ch 1) sk 1 st (dc in next st. Ch 1 and sk next st) around. Join to 3rd ch of beg ch 4.  Finishing Row. Ch 1 and sc in joining. Sc in next ch 1 sp. (Sc in next dc, sc in next space) around. Join to beg sc with sl st. End off and weave in the end. Set the piece aside. Cord.  Make a ch of 60. Sc in 2nd ch from hook and in each ch across.

Increase Formula

Crochet Stitch Increase Calculator Crochet Stitch Increase Calculator Enter the number of stitches you want after increases: Enter the number of stitches you have now: Calculate

SC, HDC and DC Circles

Unjoined Single Circle Rnd 1. With yarn and hook, make a magic circle. In the circle make 6 sc. Do NOT join but do mark 1st st. (6 sc made) Rnd 2. Make 2 sc in each st around. (12 sc made.) Rnd 3. (Sc in 1st st, make 2 sc in next st) around. (18 sc made.) Rnd 4. (Make 1 sc in each of the next 2 sts, make 2 sc in next st) around. (24 sc made.) Rnd 5. (Make 1 sc in each of the next 3 sts, make 2 sc in next st) around. Join the 1st sc made on this rnd. (30 sc made.) Turning Rnd. The next Rnd will be worked in the back loop only. HDC Circle Rnd 1. Make a magic circle and ch 1. Make 8 hdc in the circle. Join the first hdc with sl st. Tighten the circle. Rnd 2. Ch 1, make 2 hdc in each st around. Join to the 1st hdc with sl st. (16 sts made.) Rnd 3. Ch 1, (make 2 hdc in the next st, hdc in the next st) around. Join to the first hdc with sl st. ( 24 sts made.) Rnd 4. Ch 1, (make 2 hdc in the next st, hdc in each of the next 2 sts) around. Join to the first hdc with sl st. (32 sts made.) Rnd

How to Make a Loop Stitch

Image
How to Make a Loop Stitch Wrap the yarn from front to back over the index finger aof your yarn hand . The length of the loop depends on how loose or tight you wrap the yarn in this step. For this pattern make about a 1” loop. Insert the hook in the next stitch, hook the strand of yarn from behind your index finger, and draw the yarn through the stitch. The yarn on your index finger becomes the loop. With the yarn loop still on your index finger, yarn over the hook and draw the yarn through the 2 loops on your hook. Make sure that all the loops are the same length in order to achieve a finished look. Repeat steps to make a row of loops. Note: Loops may be cut or left as is according to pattern directions.

Joining Blocks with Single Crochet

Image
Joining Blocks with Single Crochet Hold 2 blocks together with the wrong sides facing. Attach white yarn in any corner st (working through both thicknesses.) Insert hook and draw up a loop. Ch 1 and sc in the same st. and in each st across until the last corner. End off and weave in the end.. Join the first row in this manner. Repeat for 2nd and 3rd rows.

How to Make an I-Cord

Image
How to make an I-Cord With yarn and hook, make a slip knot and ch 2. Sk 1 ch and pull up a loop in 2nd ch. (You will now have 2 loops on the hook.) Remove 2nd loop from hook. YO  hook and draw up a loop in the remaining loop on hook.  (Be careful not to unravel the loop you dropped previously. Insert the loop you dropped earlier back unto hook. YO hook and draw through the 1st loop only, (2 loops remain on hook.) Repeat from step 3 to step 6 for pattern until cord is desired length, 

Making Fringe

Image
Fringe for the End of a Tail 1. Cut about 18 pieces of Black yarn about 3" long. 2. Fold each piece in half. 3. Insert hook into body of piece and hook the folded fringe loop. 4. Draw loop through piece. 5. Yarn over hook with tail of fringe. 6. Draw tail through loop and tighten. Repeat until the piece is filled to your liking.

Beard Making - Two Ways

Image
  Basic Pom Pom Beard 1. Grab your 5" piece of cardboard. 2. With beard colored yarn, wrap around cardboard about 150 times. Cut a piece of the same colored yarn about 36" long. Fold yarn in half and draw under all the top loops with a tail on each side.   3. Securely tie the two ends (tails) tog and pull off cardboard.  4. Slip off 5" cardboard.  Cut bottom loops of beard and trim as needed.  Basic Hand Sewn Beard 1. Wrap one or two colors of yarn around a 5" piece of cardboard. 2. Thread a darning needle and knot end. 3. Insert darning needle between cardboard and pull up and through about ¼". Draw needle throught the knotted portion and pull tight to secure. 4. Insert needle under yarn once again about a ¼" and pull up. Insert needle back about ⅜"  and pull back up about ¼" (partway through the last st.) Draw up and tighten. Repeat this step across until all loops are sewn securely. Remove yarn carefully and cut bottom loops. Trim as desired.

How to Carry Colors

Image
 How to Change Colors the Simple Way A. Crochet two rows of single crochet in blue. When you get to the last stitch, stop short of completing the last step. B. Grab the white yarn with your hook. C. Pull it through to complete the stitch. Do not cut color blue yarn. D. Work the turning chain with white as you normally would. E. Finish crocheting two rows in white. When you get to the last stitch, leave the last step incomplete in preparation for the next color change. F. Remember how you didn't cut the blue when you were finished working the first two rows? Now you can grab the blue with your hook, and pull it through to complete the stitch. G. Work your turning chain in blue and continue with the above steps to change colors.

Advanced Single Crochet Project: Hair Bow

Image
  PROJECT ADVANCED: Hair Bow Materials Needed: 1/10 ounce light green baby weight yarn. Size G crochet hook. Darning needle. Bobby pin or hair clip. Bow - Row 1: With light green yarn and size G hook, ch 4. Sc in 2nd ch from hook and in each of the next 2 ch. (3 sc made.) Ch 1, turn. Row 2: Sc in first sc. Make a sc inc in next sc. Sc in last sc. (4 sc made.) Ch 1, turn. Row 3: Sc in each of the next 4 sc. Ch 1, turn. Row 4: Sc in first sc. (Make sc inc in next sc) twice. Sc in last sc. (6 sc made.) Ch 1, turn. Rows 5-11: Sc in each of the 6 sc across. Ch 1, turn. Row 12: Sc in first sc. (Make a sc dec over next 2 sc) twice. Sc in last sc. (4 sc made.) Ch 1, turn. Row 13: Sc in each of the 4 sc across. Ch 1, turn. Row 14: Sc in 1st sc. Make a sc dec over next 2 sc. Sc in last sc. (3 sc made.) Row 15-16: Sc in each of the 3 sc across. Ch 1, turn. Rows 17-30: Repeat Rows 2-15. End off leaving a 12” tail. Your piece should look like the following: Bring both ends to the middle as shown b

Easy Single Crochet Project: Headband

Image
  PROJECT EASY: Headband Materials Needed: 1/3 ounce baby weight yarn. Size G crochet hook. Darning needle. Measuring tape. Row 1: With yarn and size H hook, ch 5, sc in 2nd ch from hook and in each of the next 3 ch. Ch 1, turn. (4 sc made.) Row 2: Sc in each of the 4 sc across. Ch 1 turn. Repeat Row 2 until the piece measures approximately 19“ for an adult head or use tape to measure around your own head and subtract 2” so the headband will fit snugly. End off leaving a 10” tail. Match narrow ends of the headband together being careful not to twist the headband. Thread a darning needle with the 10” tail and sew the narrow ends together. Using the darning needle, weave in all your ends.

Learn to Single Crochet and Make Fabric

Image
Single Crochet (sc) - Really Making Fabric First Row: You should know how to make a slip knot and a chain. To make a sc you must first make a foundation of chains to create the stitch. Begin by making a chain of 11 sts. Wrap the working yarn through your fingers, while pinching the chain between your thumb and middle finger of your left hand. Holding your hook in your right hand, insert the hook in the 2 nd ch from the hook. (You skip the first ch by the hook, this gives you room to begin your first sc.) YO hook and draw loop though ch. You should now have 2 loops on your hook. YO hook again and draw yarn through both loops on your hook. You have just completed your first sc. * To begin your second sc, insert your hook through the next ch. YO and pull the yarn through. YO once again and draw yarn through both loops on hook. Repeat from * across row. You should end the first row with 10 sc. Once you have completed all 10 sc, ch 1 at the end of the row. Turn your work around so the loop